Mac OS X Server: Setting up a DNS Server
Do you need a DNS server for your office or location in order to give you more control over your network, instead of relying on a third-party DNS service? Mac OS X Server lets you setup that local DNS server on your network allowing you full control over the naming of your network’s computers and servers.
Setting up a DNS server with Mac OS X Server is pretty straight-forward. An understanding of Domain Name Service principles helps simplify the process.
To get started, click on and start Server Admin. In Server Admin, click on the server that you will be configuring.
All the services available on that server will be displayed in the left-hand pane under the server name.
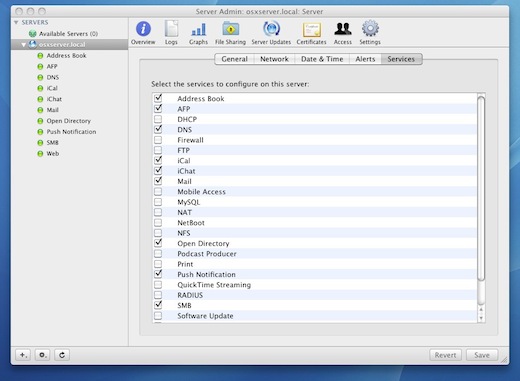
After highlighting the server, click on Settings, then Services and make sure that DNS, AFP and Open Directory services are checked. If not checked, check them to enable. We will discuss AFP and Open Directory in a future article.
Click Save
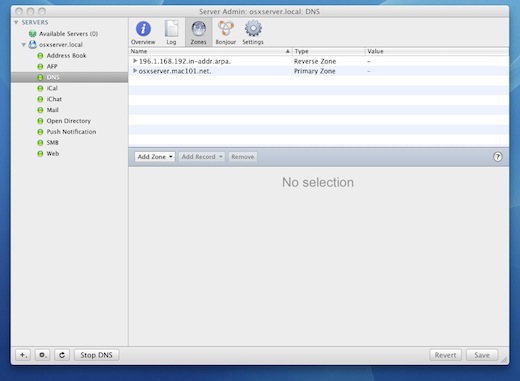
In the left-hand pane of the window, you will see the DNS service. Select it and then click on Zones in the main pane.
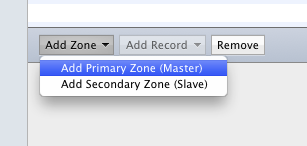
Click on the Add Zone pulldown menu and select Add Primary Zone (Master)
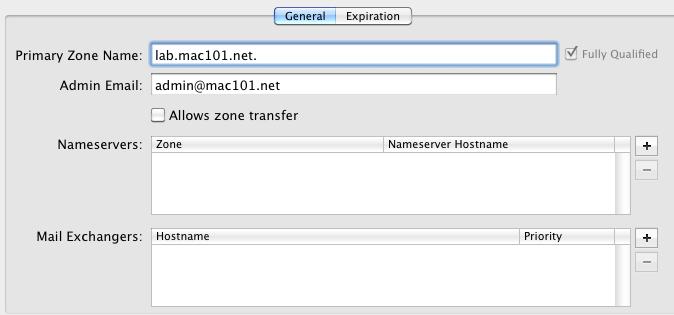
A zone named example.com is automatically created, select example.com and change to the name to the name of the zone you are creating. In our case, we are using lab.mac101.net.
Be sure and keep the trailing dot to verify that this is a fully qualified domain name. (Yes, that’s a DNS specific thing)
Double-click on the first line of Nameservers and enter the name of the server (just hostname, not the fully qualified name) you are configuring and click Save. Upon clicking Save, you will notice the fully qualified domain name will appear.
You can then begin entering individual host records by clicking on the Add Record pulldown menu.
When completed, restart the server (while not really necessary, it makes sure that all changes are active) and then test the DNS functionality by using the nslookup command from another computer and verifying the hostnames and TCP/IP addresses that you entered.
For example, if you entered a hostname called workstation, with an address of 10.1.1.100; using nslookup would return a response that looked something like this:
Server: DNS server name
Address: X.X.X.X
Name: workstation.(your domain name)
Address: 10.1.1.100
As mentioned previously, Domain Name Service (DNS) can get quite complicated, especially when working with Mail Exchangers (MX records), Aliases (CNAMES), etc, so a basic understanding of the principles is helpful, especially if your DNS server will be resolving names externally on the Internet.
A good book that will help you get a good understanding is:
DNS & BIND Cookbook by Cricket Liu
What other topics regarding DNS or Mac OS X Server in general would you like to see? Please leave comments below and we’ll do our best to answer your questions.
