How to Setup Remote Access via VNC - Mac Based Remote Desktop for Mac PC Linux iPhone
How to configure your Macintosh for Remote Access with VNC in order to allow Remote Desktop access from your Mac, PC, Linux Distro, or even iPhone. Additionally we cover Dynamic DNS setup, and DHCP reservations to use in conjunction with your Remote Desktop setup.
Step 1: Sharing
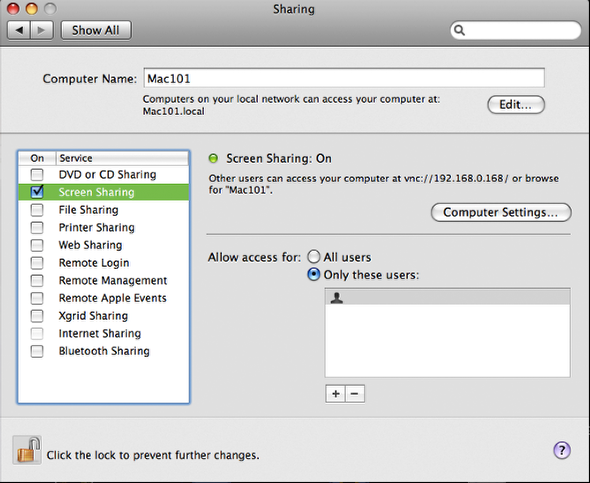
Open System Preferences > Sharing
Check the Box “Screen Sharing”
Stay on this screen and go to the next step.
Step 2: Add and Authorized User
Slect Only These Users, then click the + Icon in the Allow access for: section.
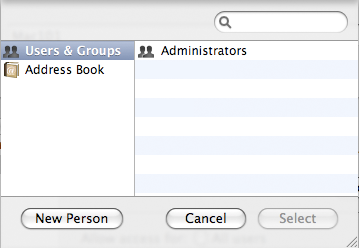
Your availible users will show here, Select the user account you wish to allow remote access for.
Step 3: Computer Settings and Password
Check the Box “VNC viewers may control screen with password:”
Then enter a secure password.

Step 4: Register at DynDNS.com
Register an account at http://www.dyndns.com
https://www.dyndns.com/account/entrance/
An alternative is OpenDNS.com which offers a IP Updater Client for Mac, however I prefer DynDNS since it allows you to select a different domain name, which I feel is more secure. I cycle my domain name every few months.
Step 5: Add New Hostname
After logging into DynDNS.com navigate to your Account section at https://www.dyndns.com/account/
Click on Add Host Services
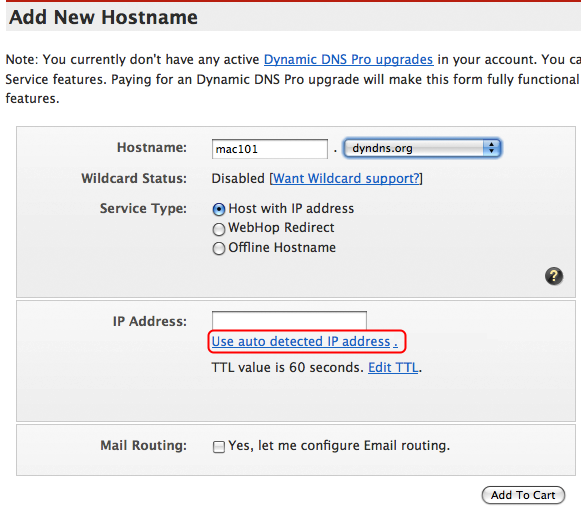
Enter a Hostname to your liking, and select an available domain name (dyndns.org in this example). This will be the hostname you use to connect with VNC.
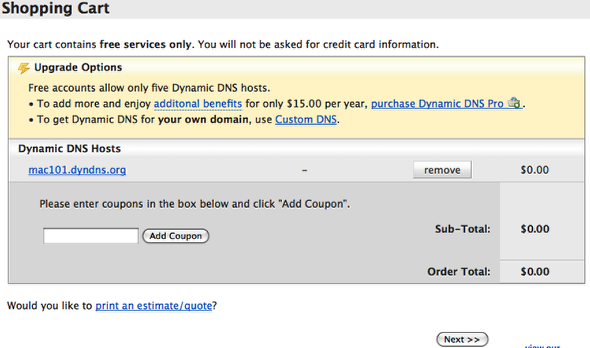
Step 6: Cart
This screen will show you the Dynamic DNS Host you specified. Click Next.
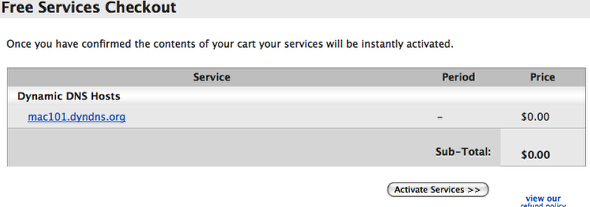
Step 7: Free Services Checkout
This screen will appear to confirm your “purchase”. Which is free. Click Activate Services.
Step 8: DynDNS Hostnames
This screen will now display and show you your new hostname and the details will show your current IP address. Continue to the next step at this point.

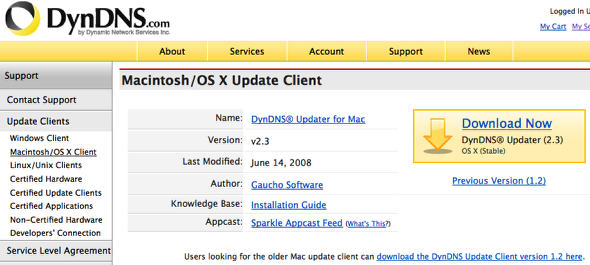
Step 9: Download DynDNS.com for Mac
https://www.dyndns.com/support/clients/mac.html
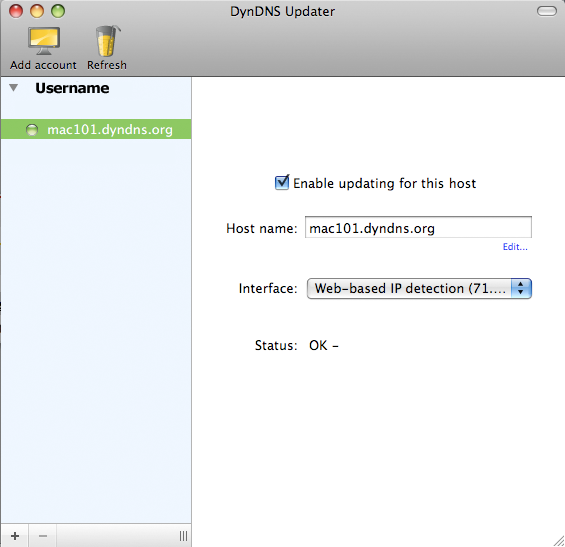
This client will run as a daemon and updates your IP address to your hostname at DynDNS.com. Since your IP changes quite frequently we need to run a service such as this, so you will always be able to access your computer at the hostname you specified earlier. In our case, that is mac101.dyndns.org.
Download the DynDNS Updater for Mac and install the App.
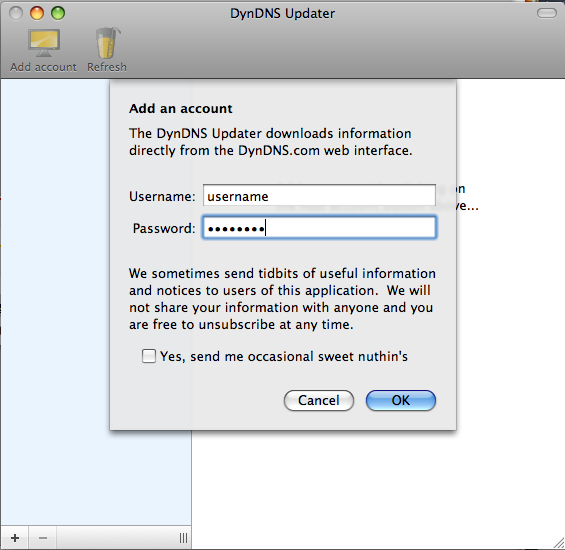
Step 10: Open DynDNS Updater for Mac
Enter your recently created user account information from DynDNS.com.
Step 11: Enable Updating
The hostname record we created will now show up, click on the hostname on the left and check the box: “Enable updating for this host”
That’s it for now, next we move on to the Router configuration.
Step 12: Network Utility and MAC Address
NOTE: There are a billion different routers out there, we will be covering the AirPort Extreme & Time Capsule. You can use this as a guide for others, but its up to you and Google to find your specific instructions on modifying your router for DHCP Reservations and Port Forwarding.
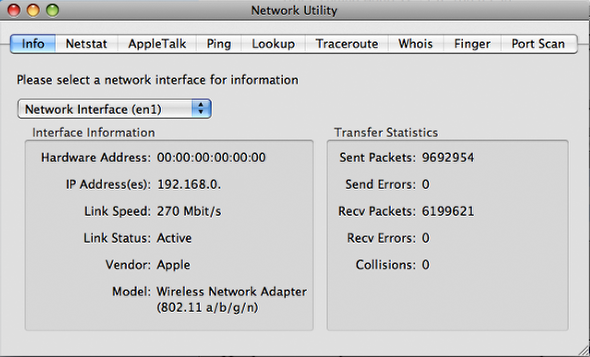
Open Network Utility and select your preferred Network Interface, in my case this is (en1). I use my wireless 99% of the time, so I will copy the Hardware Address so we can add this interface to the router and allow it to obtain a Static IP address via DHCP.
Copy the MAC Address or Hardware Address: 00:00:00:00:00:00
Note: I entered all zeros, yours will look different.
Step 13: AirPort Utility & DHCP Part 1
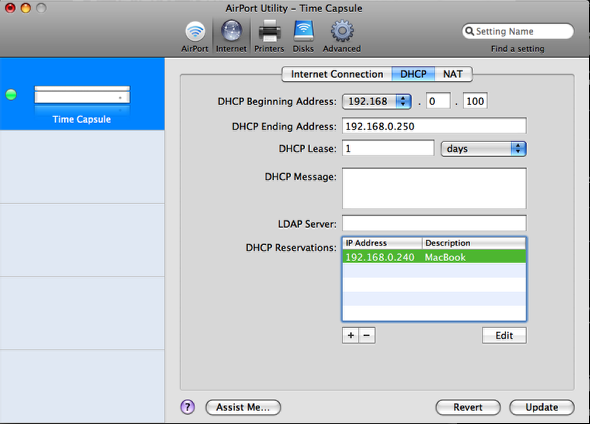
Open Airport Utility select Manual Setup, then Navigate to Internet > DHCP
In the DHCP Reservations section click the + icons to add a new reservation.
Step 14: DHCP Part 2
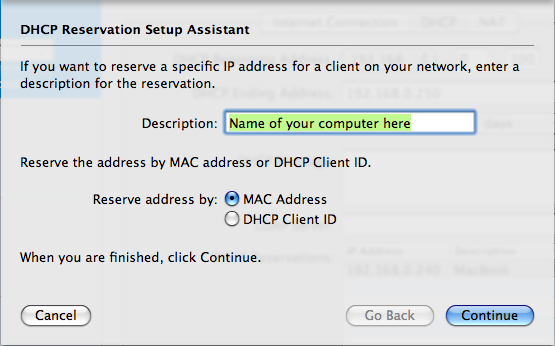
Enter the name of your computer in the Description field. Select MAC Address for Reserve address by:
Step 15: DHCP Part 3
Enter your MAC Address (Hardware Address) that we got from Network Utility. Click Done.
Note: Your IPv4 Address has to fall within the allowed DHCP Range.
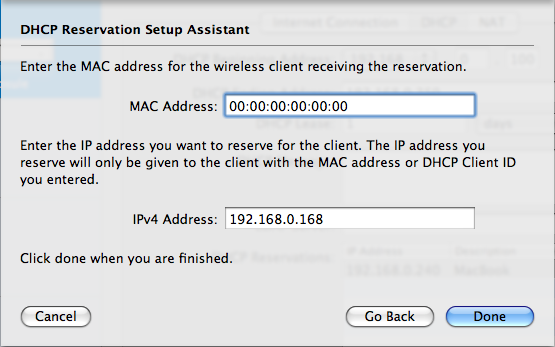
Step 16: NAT and Port Mappings
In AirPort Utility navigate to: Internet > NAT
Check the Box for Enable NAT Port Mapping Protocol.
Next click the Configure Port Mappings… and move on to the next step.
To put it simply, NAT (Network Address Translation) allows us to define a port to forward from one IP to another. In our case, traffic bound on port 5900 (VNC) on the IP mac101.dyndns.org will be directed to our laptop/desktop’s internal IP address that we made the reservation for.
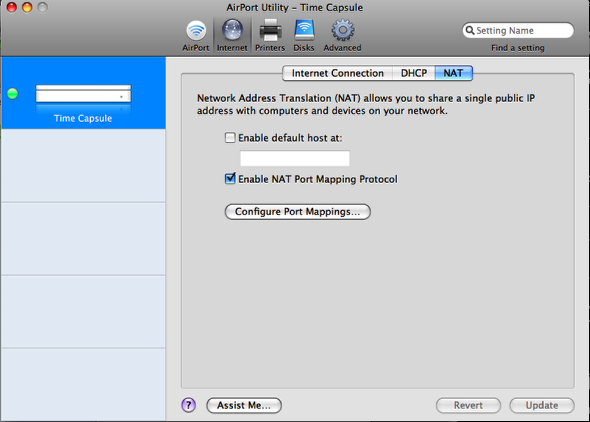
Step 17: Remote Desktop Port Mapping
You wont see the Apple Remote Desktop selection in the Allow list.
Click the + icon to add a new Allowed port mapping.
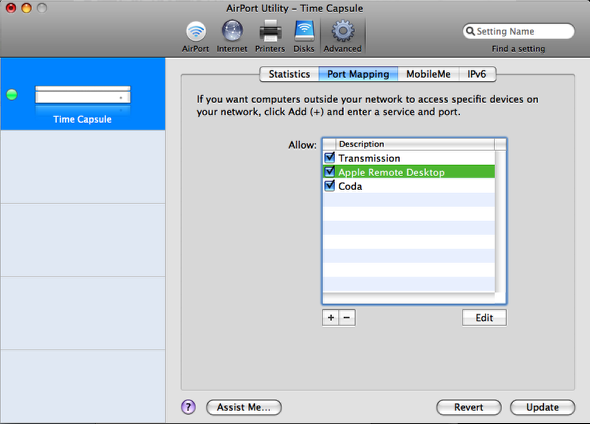
Step 18: Port Mapping Setup Assistant Part 1
Lucky for us AirPort Extreme and Time Capsule Users we have the services pre-populated by Apple. Select Apple Remote Desktop from the Dropdown.
Enter the Private IP Address of your Laptop/Desktop you want to connect to. This would be the DHCP IP address we set the reservation for in the step titled DHCP Part 3.
Click Continue
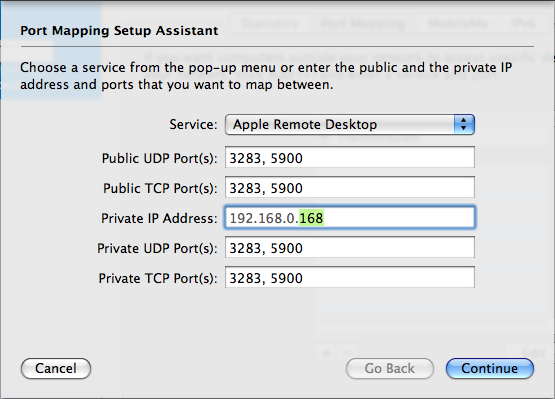
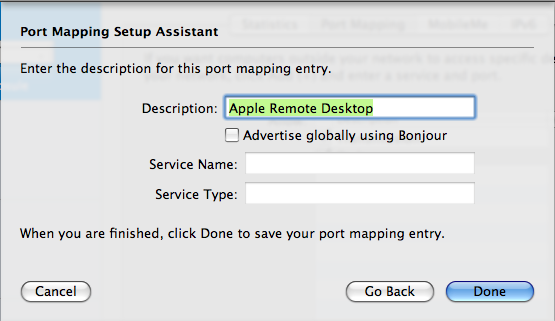
Step 19: Port Mapping Setup Assistant Part 2
The default Description is fine here, Click Done.
No need to Advertise this on Bonjour.
Next Click UPDATE on your router, and it will apply your changes and reboot the router.
Step 20: External Access with VNC
You have lots of options from here. Let me make a few recommendations:
Mac: Chicken of the VNC
Or the default app in OS X in /System/Library/CoreServices/Screen Sharing.app
iPhone: Jaddu VNC
PC: Tight VNC
Linux: Tight VNC
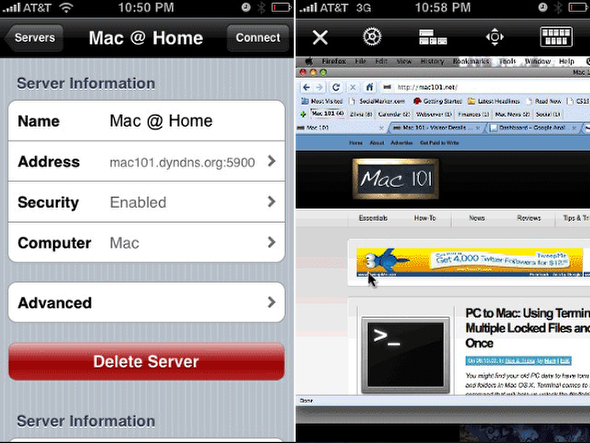
Step 21: Remote Connection Example
In the preferred VNC App enter your hostname and password and click connect. You’re all done, and can now enjoy you mac, wherever you are!
DHCP, DNS, Remote Access, Remote Desktop, Screen Sharing, VNC


June 28, 2010 at 7:48 pm | promptcs
Very good information. How would I set this up for several mac’s? I am a windows manager and have just been taked with helping 6 mac folks and will have to do it all off site. can I use different port numbers just like with windows VNC?
January 29, 2011 at 4:46 am | archimaniak
hi,
i’m stuck at step 13!
I’m opening Airport utility on my Mac, but theres nothing there! I’m “rescanning” but nothing comes up on the menu!
please help!
July 15, 2011 at 12:13 am | jeremygillies
Hi - This is a great walk through but like the above I am stuck at step 13 since the Airport Utility interface has changed since v7.4. Would you be able to update this to deal with the new version of the Airport Utility? Please!